Five ways To Improve Your Location Portraits
So, you want to improve your location work and get out of the studio. Whether you shoot families, kids, adults, or fashion, these tips will help bring your work up a notch.
So, you want to improve your location work and get out of the studio. Whether you shoot families, kids, adults, or fashion, these tips will help bring your work up a notch.
1: Change Your Shooting Angles
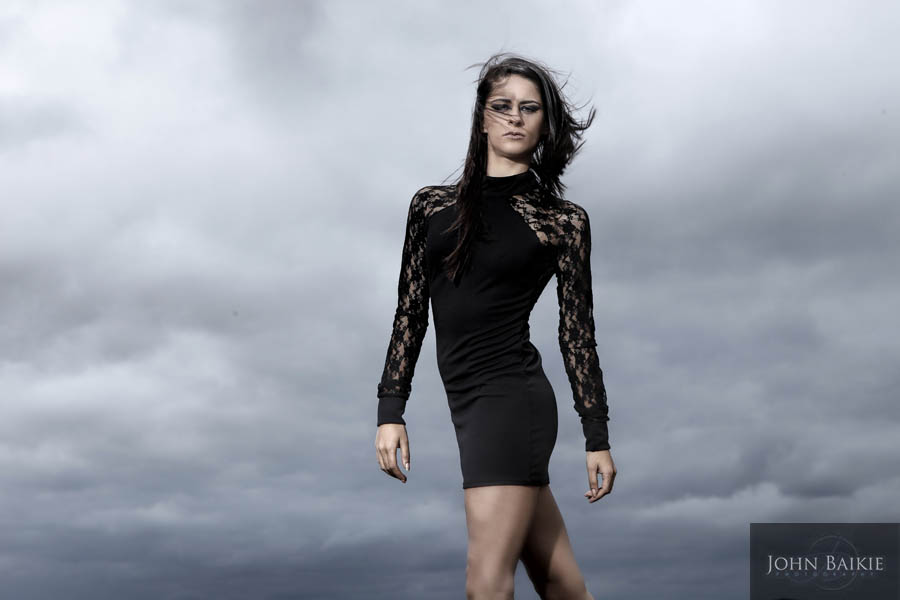
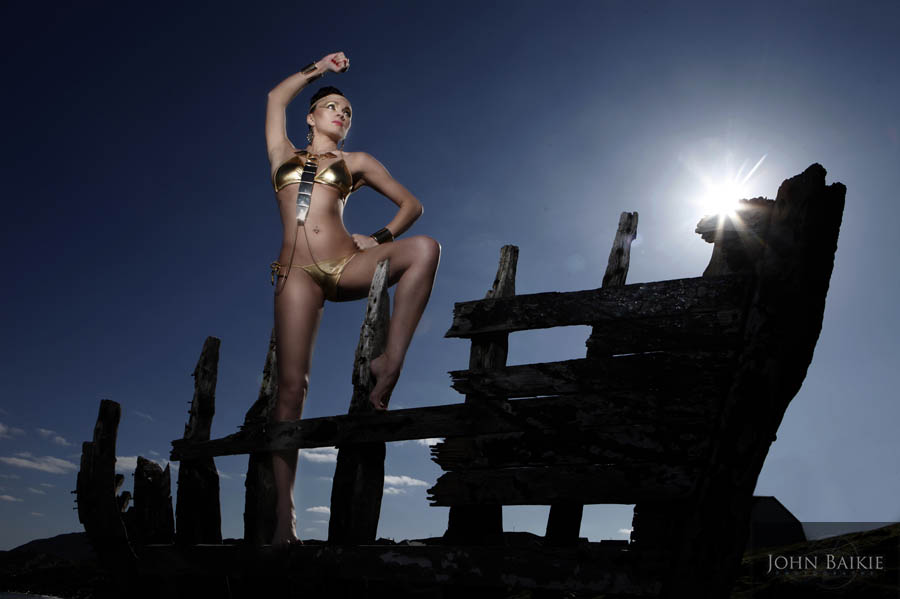
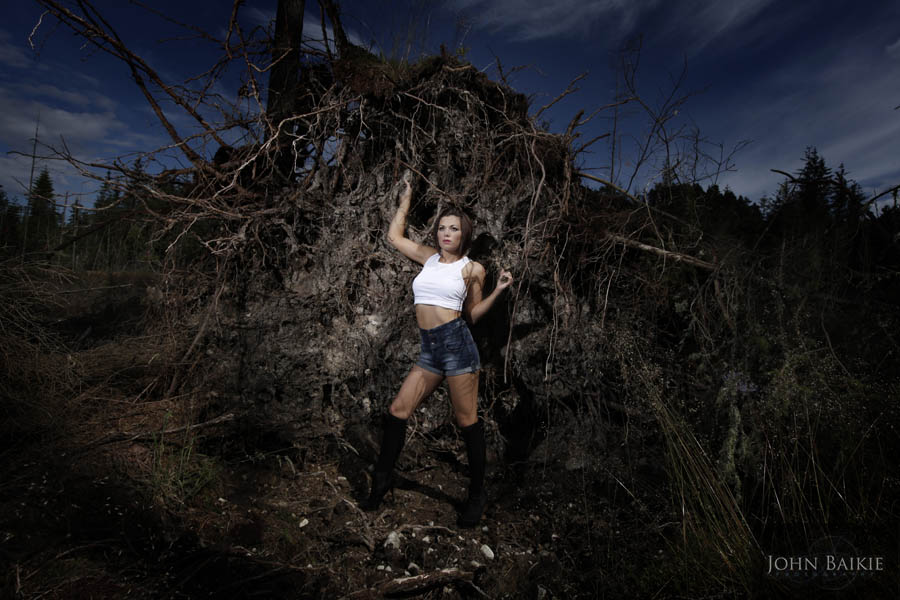
By looking around the scene and preparing properly it is possible to make your shots more interesting. Get down low on the ground (a reflector is handy to lie on if it is wet!) and shoot upwards, this tends to make the subject look taller which is always appreciated. In these shots I have placed my model higher up and shot from below to make them seem more powerful. It gives us a more powerful background and sky as well as adding more ‘strength’ the model’s pose.
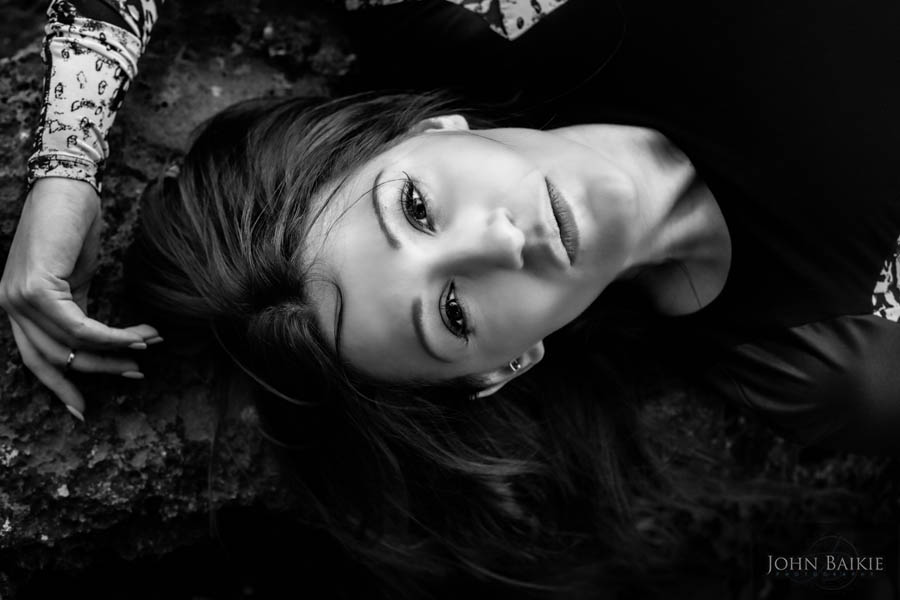
Don’t be afraid to get up high as well but avoid shooting in such a way that your subject looks shorter and worse still, wider than they actually are. They won ‘t thank you for this. Having your subject lie down and shoot from above is often a good look. Lighting the subject from above can be a challenge but by carefully positioning yourself and the model, you should be able to get some nice flattering overhead light onto your subject. In the first image I have used my QFlash to pop some light onto the models face.
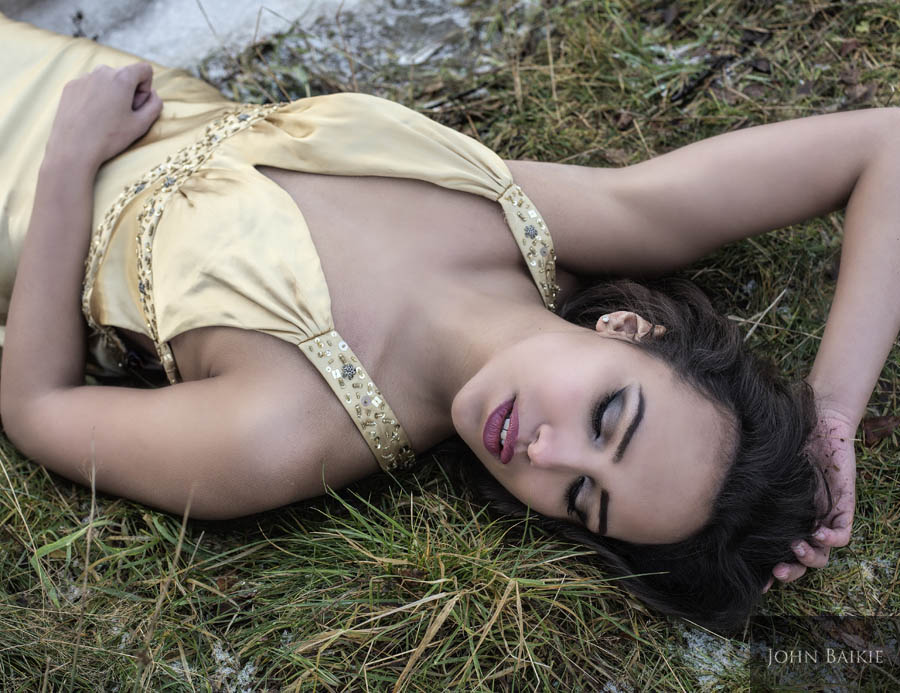
In the other image I have just used the overcast sky to light the models face
2: Use Wide Angle Lenses
Much as I love my 50mm lens for portraiture, I love having a second camera body loaded up with either my 24mm or my 16-35mm lens. I like to do a few wide shots that have big skies or show more of the background. These can have a more dramatic feel, depending on the scene or location. In these images I have brought the environment into the shot to create a dynamic composition. This can give your portraits a more eye catching and unique feel, and gets away from the standard. Change your focus point as you shoot as it is easy to miss the focus while recomposing your shot due to the exaggerated distances. I like the story telling aspect of shooting wide, where you can use as much of the background as you like and create an editorial feel to the images. Just remember not to be too close to your subject as you can distort facial features. Also try not to place your subject to close to the edges if you shoot extra wide as they will be distorted and look wider than they actually are. I have shot these using an approximate ‘rule of thirds’ composition, which really works for me. In these images you can see how I have brought the backgrounds in to play by shooting wider.

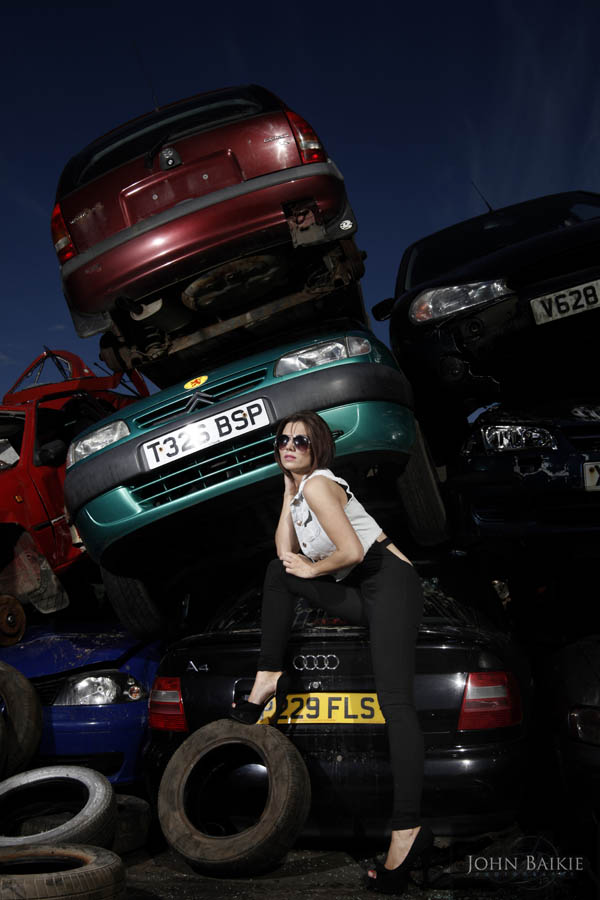
In the other image I have shot wide and got close to the subject to exaggerate the perspective and make the model Mairi look more powerful.
3: Metering
Learn to use a meter to balance your ambient light and flash. Be honest, how many of you use a meter when shooting outdoors? if you are using available light or flash it will save you a load of post production work if you get a good light meter and learn how to use it quickly on the move. I am using the new Sekonic L-478 DR which is a cool piece of kit. It has a touch screen which will appeal to all the gadget geeks out there, and also is compatible with the Pocket Wizard range which means you can set things up wirelessly with little effort once you have it set up. It’s fine using the LCD on your camera as a meter but it is never as accurate as this, and is influenced by colours and other aspects within the image. It is fine as a reference point, but using a meter will mean you deliver correctly metered and exposed images onto your desktop. In the shoot here, I have used a variety of off camera flash set ups and the flash meter has made it very easy for me to get everything set up before the model was even in position. This means no wasting time on test shots and messing around moving things while the model gets bored stiff. In these shots I have taken an ambient meter reading to get my background right

I then got the light set up and metered it to get the same f8 that I had measured for the ambient. It would be a lot more guesswork to try to set it up like this without the meter.
4: Bring The Studio Outdoors
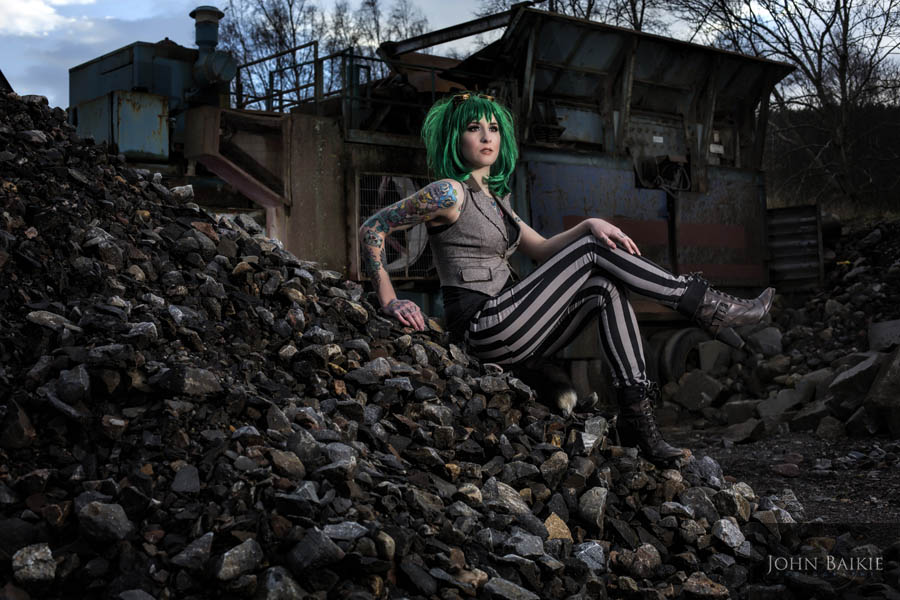
It may seem like a lot of work, and sometimes it can be a bit of a trek carting bulky kit to a location, but if you can, do it. It really does make a difference and allows you to have more power and more control over your images. It isn’t cheap buying battery power but you’ll see a difference immediately. I use the Bowens Gemini 500R heads, and even here in the Highlands of Scotland, where the weather can be unpredictable, I love to get these out and about. As many will know I tend to use some pretty unusual locations, so it can be a real struggle getting the kit where you need it but get an assistant or helper to come along and help set the gear up, and anchor things down while you focus on shooting. I like to use either one light with a beauty dish, or add a second light with just the kit reflector attached as a fill or rim light. In the first image I have the 55cm beauty dish on the model at about 45 degrees to my right. You can get great images with portable speedlights and other flashguns but I don’t think you can get the same quality of light as you would with these. The extra power you have at your disposal is fantastic as well, especially on a sunny day.
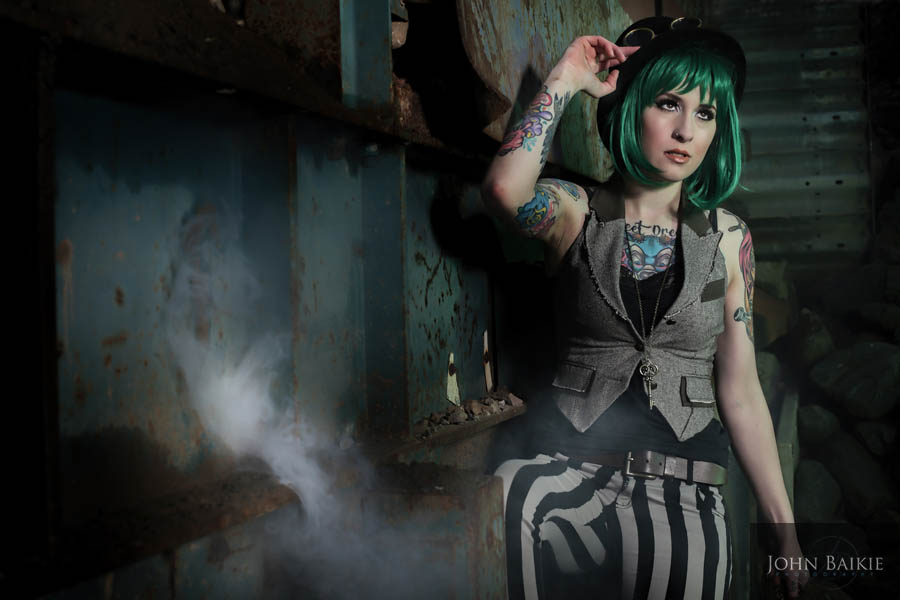
In shot two I have moved the light round to almost 90 degrees to my right, and added the second light with a green gel, just to give a little bit of colour to the background, and match the green hair slightly.
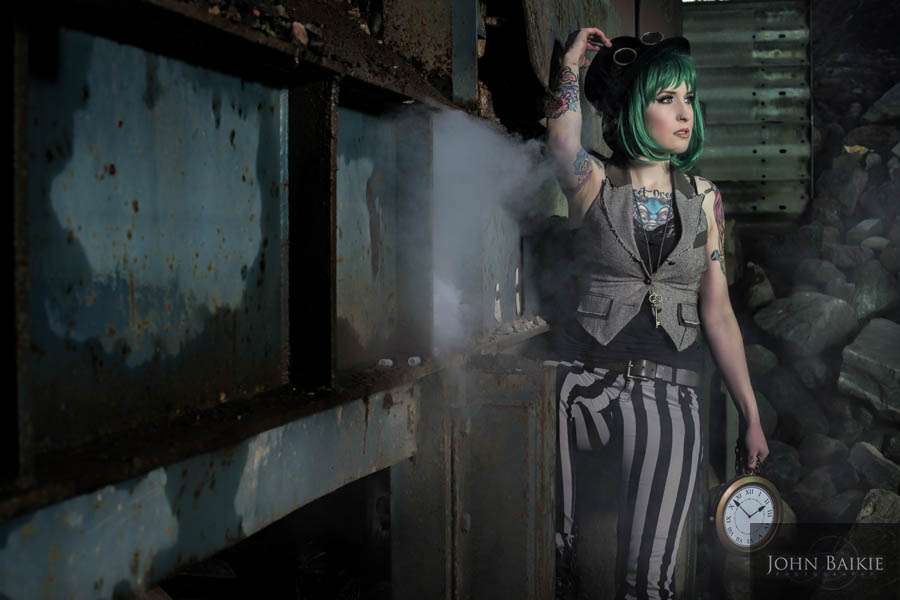
In shot three we changed the colour scheme. I have used the beauty dish almost directly behind me this time with just a tiny bit of fill light on the second light to brighten up the red machinery behind the model.

5: Underexpose The Background For Drama
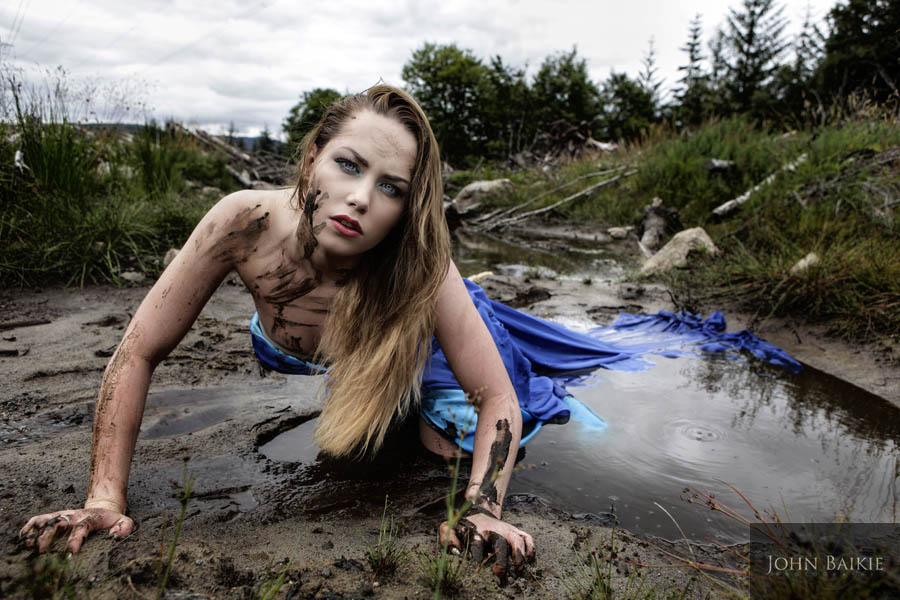
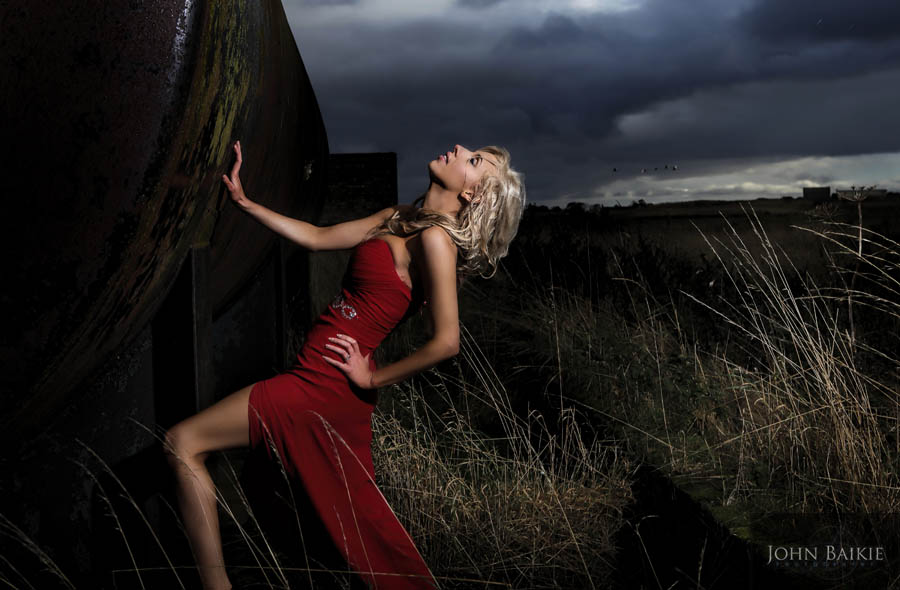
If you have got the hang of Off Camera Flash, and particularly using the studio heads, now is the time to get creative and add some drama to your images by underexposing the ambient light. The key to this is using your shutter speed to underexpose the image. Many camera/flash systems have a maximum flash sync speed of around 1/200th of a second, and although you have options to use things like high speed sync and hypersync, we are going to stay with the theory that we are limited to 1/200th for this particular shoot. The first thing I would do is check where the ambient light is, and how you want to use it. For this style the ambient light is going to be the fill light and the flash will be the main/key light. This means you have to overpower the ambient. If it is very sunny and you decide to shoot into the sun, you will need a load of power in the flash. If you use speedlights, try mounting two of them together to give you options of double the power output.So based on this I will start my ambient reading with a shutter speed of 1/50th of a second. This gives me 2 stops of underexposure available. For example if the meter reading for the ambient is 1/50th at f8, I can then shoot at 1/100th at f8 to underexpose by a stop, and then drop even more to 1/200th at f8 to make it more obvious. Once I have chosen my ambient settings, I must set my flash to give me f8 on the model. Once this is set that doesn’t change. These images were taken on very different days. The first one was an overcast day and it actually started bucketing down around the time we shot this image. I have underexposed the already dark sky by two stops and it really adds drama. I also arranged for some geese to fly past to add some background interest.
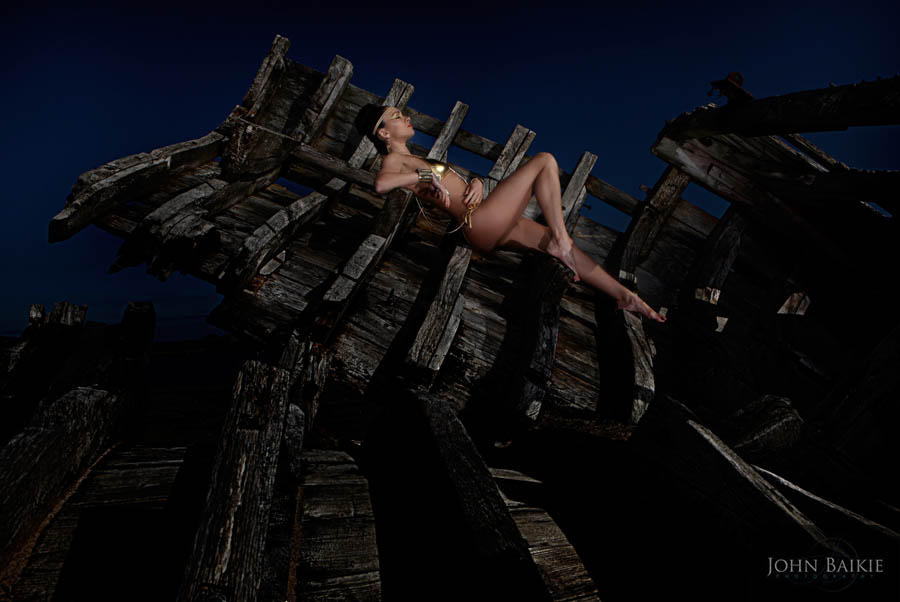
The other image was taken on a beautiful day in the North of Scotland in the middle of summer. It was early afternoon and the worst possible conditions for shooting with the sun directly overhead. I have underexposed this one by two and a half stops and it totally changes the look of the image. I had to get the light very close and shoot with the 16-35mm wide angle for this to work.
Hopefully these tips will be handy to try to vary your shoots and get you thinking differently. Feel free to leave comments if you have any thoughts.
